www
123
5. Mechanisms
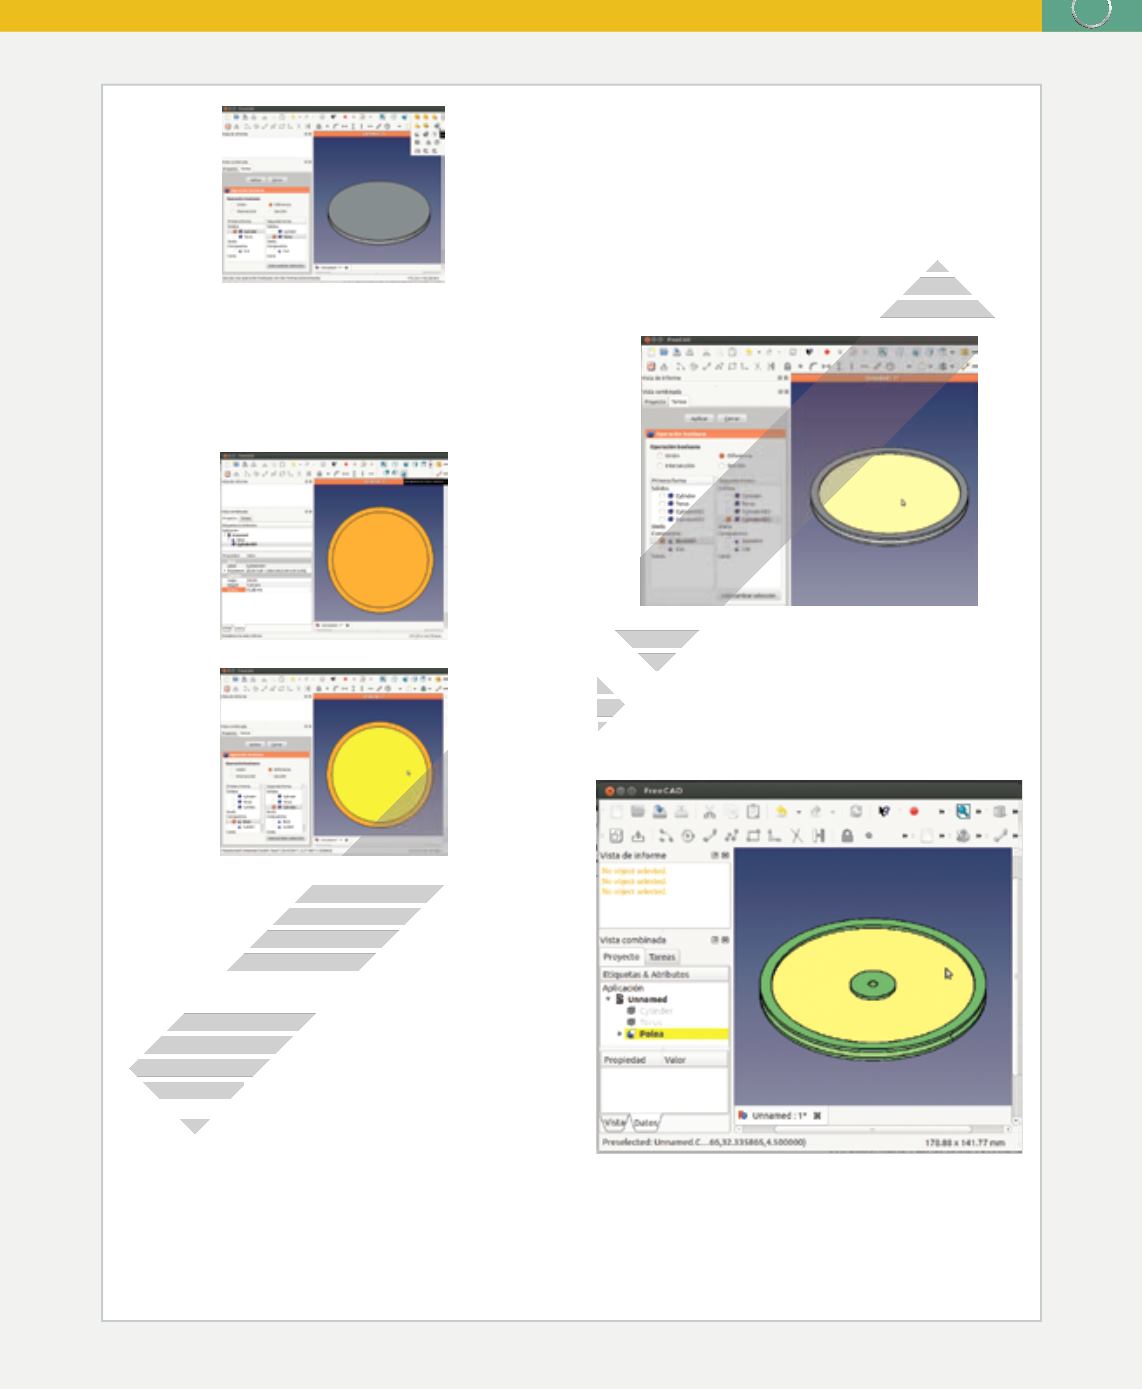
Making the piece lighter
To make the pulley lighter, we can remove cylinder from
the faces of it. In this case, we can remove a cylinder
with a radius of 45 mm from the upper side and another
cylinder with a radius of 1.5 mm from the lower side.
The next image is a view of the Base object from below,
and the cylinder that has been created on the lower side.
We use the boolean difference operation to subtract the
new cylinder, in the same way that we removed the torus
previously.
We rename the new Cut001 object as Base2 and then
repeat the same operation for the cylinder on the upper
side of the pulley. To do so, we move 4.5 mm upwards
along the Z axis.
The next image shows the result of the previous
operations, in which the central area of the pulley is
thinner than the grooved edge.
The shapes that we have created are not erased from the
program’s memory, even though we cannot see them
and they do not form part of the final object that we
will print. As a result, we can use these objects again for
other projects.
We continue by reinforcing the hub, which is the area in
the centre of the pulley. We do this by adding another
cylinder with a radius of 10 mm and a height of 6 mm,
using the fusion function. The resulting object is named
‘Fusion’ by the program.
Finally, we remove a cylinder from the centre of the
‘Fusion’ object to make a hole for the pulley’s axle. This
hole will have a height of 6 mm and a radius of 2 mm.
We do this by using the boolean difference function.
When we have finished designing the pulley, we can
save it to make other changes in the future or to use it
for other projects. To save the pulley, we use any name
that we like, along with the
.fcstd
extension used by the
program. To save the object we use the menu option
File
→
Save
.
FreeCad also lets us save objects with the
.stl
extension
for 3D printing files. To save our work in that format,
we select the object that we want to save, which in this
case is Pulley. Then we go to
File
→
Export
→
Type
and
select
Meshformats
. We give the file a name with the .stl
extenion and then select
Save
.
ADVANCE EDITION


