123
5
Structures
Building structures with cardboard and paper
This section has the following objectives:
❚
To make simple structures using different materials.
❚
To reinforce the joints of the structures being made.
❚
To analyse the stages involved in assembling the structure.
Three procedures are given for improving structures. Students
perform these using simple materials which show high resistance
under repeated use: paper, cardboard and a piece of string.
❚
Paper: how to make resistant bars by rolling sheets of paper, how
to join the bars together and how to reinforce these joints.
❚
Cardboard: identifying the characteristics of cardboard and
the correct means of use with particular emphasis on internal
reinforcement.
❚
String: a material that plays an important role in different types of
joints.
It is also important to follow a logical and coherent order when
assembling the bridge structure. Doing this systematically will help
students to improve the outcome.
5
+
www
STRING
Let’s look at different ways to shape paper and cardboard so we can use them to build our bridge. Pay close
attention to how we join the different elements and materials. As you have seen, the joints are the weakest
points in a structure.
When assembling your structure, keep the following things in mind:
1.
Make the same pieces at the same time.
2.
Build the biggest pieces first: deck, columns, etc.
3.
Find pieces that you can make separately on a flat surface. For example,
one side of the bridge, a column or the deck. Once you have built all the
pieces, put the whole structure together.
4.
Finally, add pieces that you have already built to the structure and then
add the smaller support pieces and the tension rods.
Once you have finished building the structure, study the final features,
elements, dimensions, weight, etc. to see how it has changed from your
initial design. You can see how the assembly of the bridge affects the end
product.
A piece of string can be a key piece in a structure. It
canbedifficult toattach it toothermaterialsbecause
it slips. Use knots, cuts or wrap it around the piece
and glue it. Look at how we join the string to these
different elements:
Wrap the string around
and use glue.
Make two cuts, wrap the
string around and use
glue.
Make a cut and wrap the
string around an object
that acts as a stop.
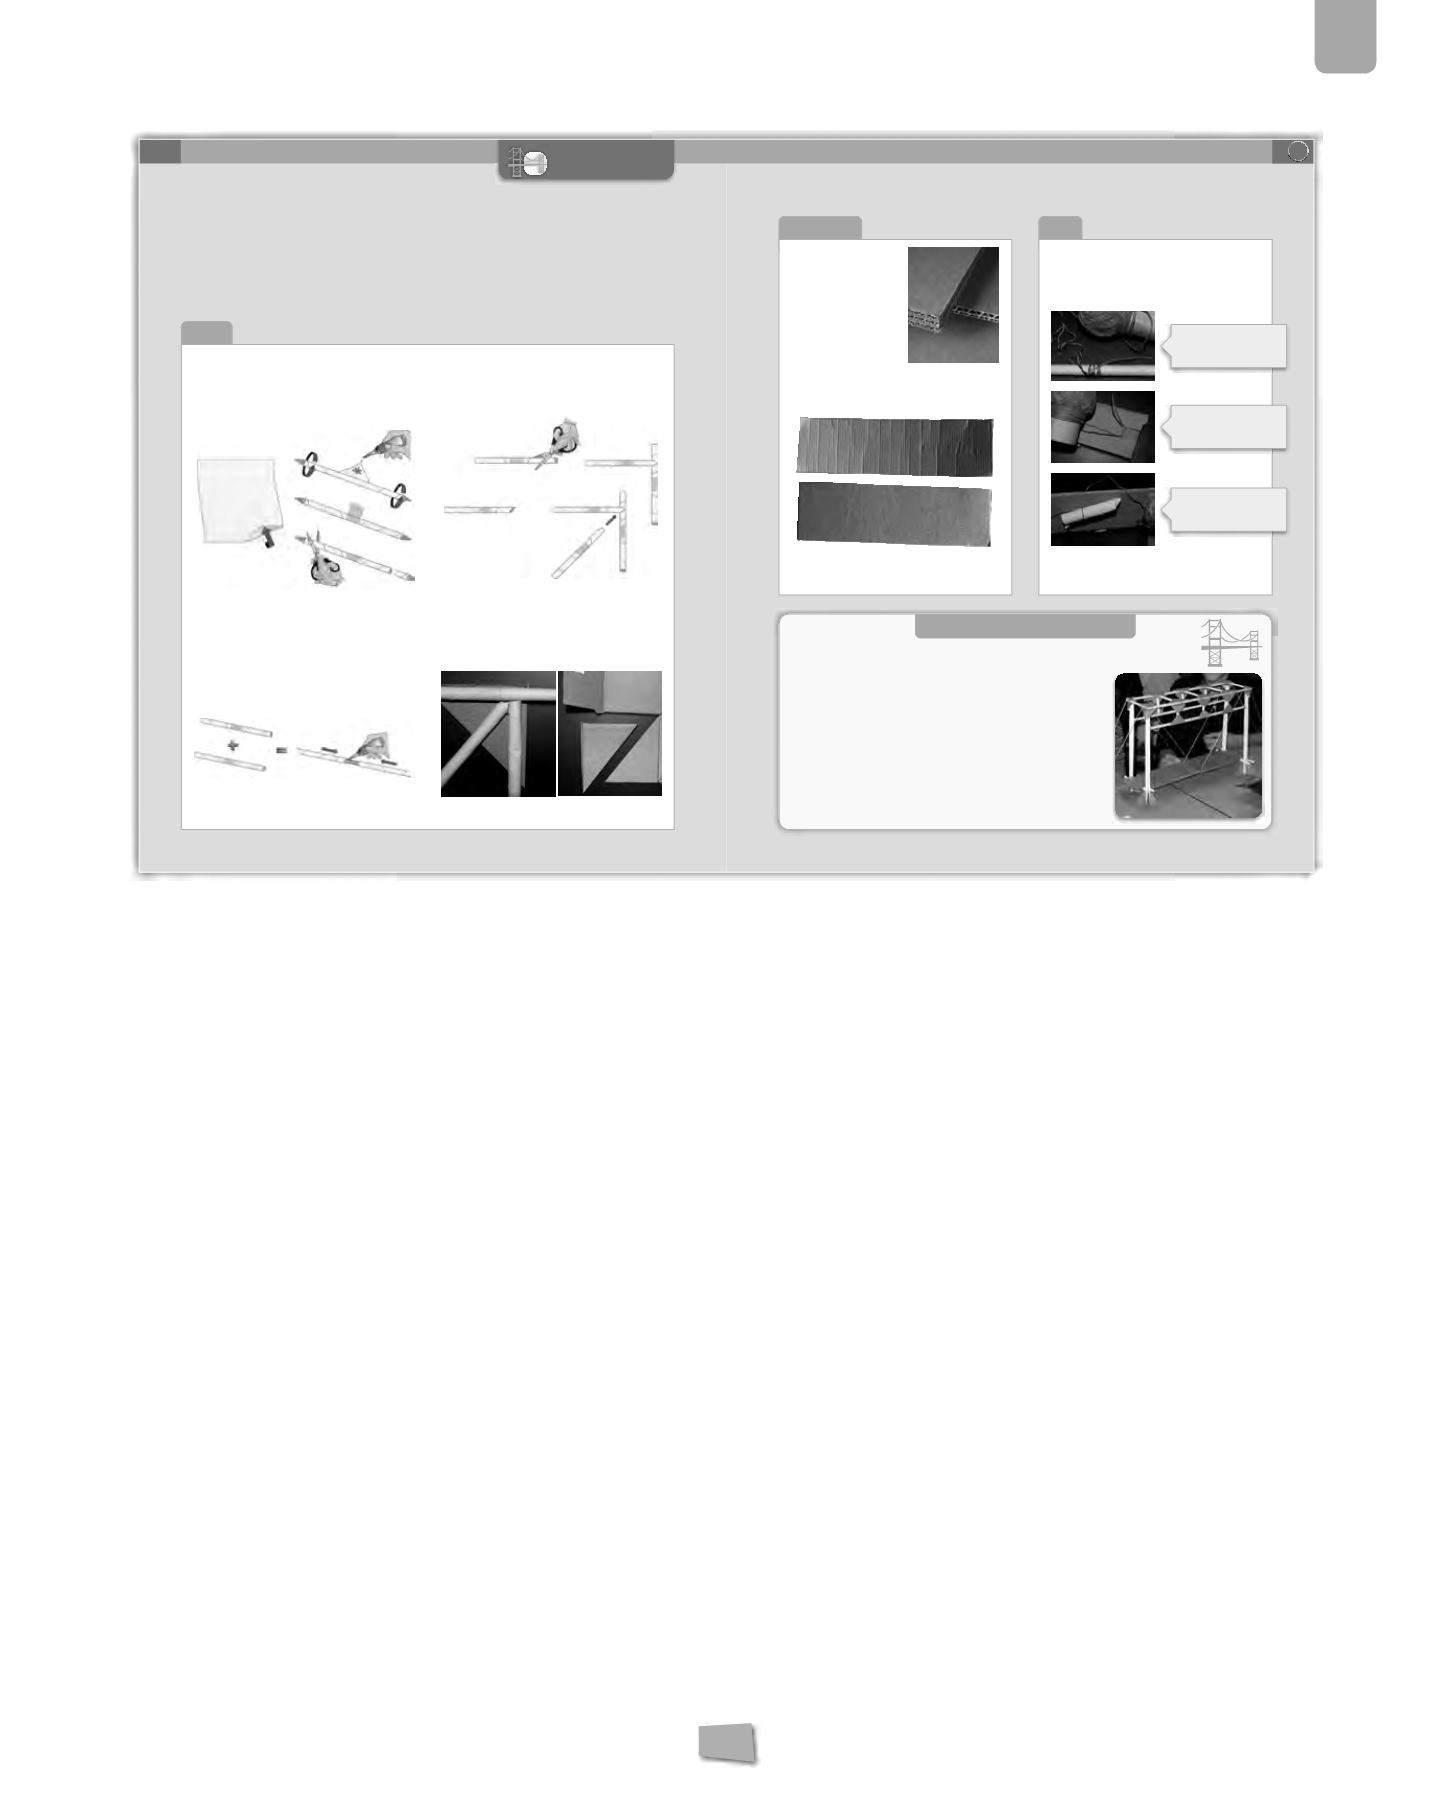
PAPER
1.
Roll up each sheet, starting at one of the corners.
2.
Stick the end with glue, stick glue or adhesive tape.
3.
Cut off the ends.
Why do you think we do this?
4.
You can roll up several sheets together, at intervals,
to make thicker, more resistant bars. Thinner paper
is easier to roll up.
❚
To join several bars together, you can insert one
inside another, using different thicknesses.
❚
You can also join bars by inserting small tubes
into each ends. To reinforce the joints, use a piece
of adhesive tape.
❚
To make perpendicular joints, flatten the ends
before joining them. You can also
bevel
38
the
ends so that they fit together perfectly.
❚
You might need to reinforce some joints. To do
this, cut out some triangles of thin cardboard
to make braces. Attach them to all the bars in a
joint.
38
bevel:
cut at 45° angle onboth sidesof the end
With sheets of recycled paper we make resistant bars.
How?
CARDBOARD
When you work with
cardboard, remember that
it is more resistant in one
direction than in another.
This depends on the folds
on the inside. Look at the
folds in this photo. When
you understand how
cardboard is made, think
about which way it is
more resistantanddecide:
a)
Which of these two pieces will be better for the
deck of our bridge?
b)
Howwouldyou reinforce thecardboard tomake
it more resistant to bending?
String is also useful to hold bars together that cross
each other. A joint made of string and glue is solid
and resistant.
ASSEMBLE THE STRUCTURE OF THE BRIDGE
PROCEDURES
Building structures with cardboard and paper
122
123
5. Structures


